
FOD Area Classification and Facility Marking Guide
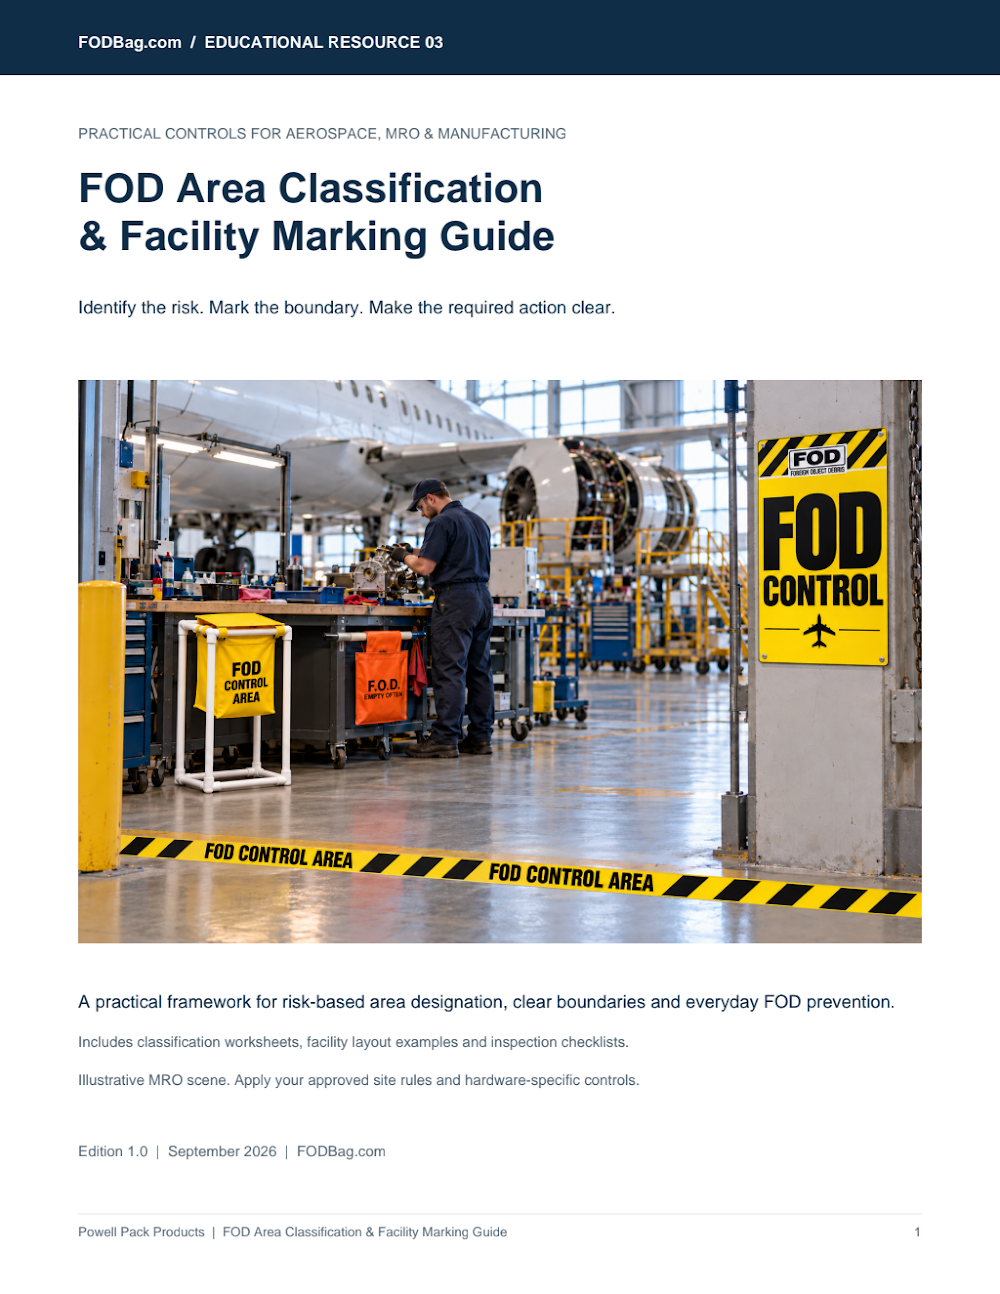
Identify the risk. Mark the boundary. Make the required action clear. A practical framework for risk-based area designation, clear boundaries and everyday FOD prevention. Get the Free GuideSee What's Inside24
Pages
3
Levels of FOD-Sensitive Area
5
Question Task Assessment
4
Printable Tools
About the FOD Area Classification and Facility Marking Guide
Reviewed by Trent Powell, Founder, FODBag · Reviewed: November 10, 2026
Quick answer: A useful FOD boundary answers three questions before anyone crosses it: What area am I entering? What must I do? Who resolves uncertainty? This guide helps a FOD manager turn those answers into a repeatable facility-marking plan, using the three levels described in NASA MSFC-STD-3598D: Awareness Areas, Control Areas and Critical Zones.
Who it is for: FOD managers, facilities, operations and quality teams planning or improving area classification and marking in aerospace MRO and manufacturing.

What’s Inside the Guide
Twenty-four pages from classification to installation and audit.
Classification and Color
Assess and Record Decisions
Map and Mark
Signs, Tape and Stickers
Bags, Cans and Quantities
Install, Train, Audit and Forms
Key Principles From the Guide
A short preview of how the guide approaches area marking.
Start with one pilot area
Color helps recognition; words define action
Define FOD Safe Area carefully
Approve before you activate
Measure behavior, not just markings
Plan from a marking schedule
What You Will Leave With
- A documented classification decision for each work area and operation.
- A map connecting entry points, boundaries, collection locations and accountability stations.
- An approved marking schedule and instructions for employees, contractors and visitors.
- Evidence that the markings remain legible and the controls work in daily use.
Fast-Start Route
- Understand classification, color conventions and FOD Safe Area wording.
- Assess exposure, record decisions and handle changing operations.
- Map the facility and specify signs, tape and entry stations.
- Connect collection bags, cans and behavior reminders, and plan quantities.
- Install, train and audit the system.
- Use the printable records to maintain the system.
Printable Tools
- Tool 01: Area classification decision record
- Tool 02: Facility marking and station register
- Tool 03: Boundary and collection inspection
- Tool 04: Temporary zone and change approval
By FODBag.com · Updated November 9, 2026
Area Classification Playbook: Level Rules, a Worked Bay Example and a Marking Decision Aid
This playbook is for the person who has to decide which level each area gets and then mark it so people read the floor the same way on every shift. It sets out what public documents say about the three levels, works one hangar bay through from boundary to tape and sign count, and gives a decision aid and an audit checklist you can copy into your own program. Every source is listed at the bottom with the paragraph or slide we read.
What the published sources say about each level
NASA defines the three classifications in paragraphs 3.2.5, 3.2.6 and 3.2.8 and says Critical Zones are contained (nested) within Control Areas (paragraph 5.5) (NASA MSFC-STD-3598 Rev. D). IAQG’s public guidance says the organization should determine area designation based on a FOD risk assessment of product characteristics and operations, and set the controls for each designation (slide 21); the same guidance shows Awareness, Control and Critical as commonly used designations (slide 22) (IAQG SCMH 3.4.2 Rev. D).
| Level | NASA definition, in short | Who may enter (NASA 5.5.2.4) | NASA sign symbol (5.5.7.3) |
|---|---|---|---|
| FOD Awareness Area | Low potential for FOD entrapment, FOD migration or impact damage; may also be a buffer that limits migration into a neighboring Control Area or Critical Zone (3.2.5). | Access need not be restricted, but signs, barriers and other visual cues must alert people they are entering. Visitors with Site Manager authorization. People assigned or with recurring access need FOD awareness training. | Blue diamond (or equivalent) |
| FOD Control Area | High potential for entrapment, migration or impact damage to FOD-sensitive hardware (3.2.6). | Unescorted access limited to trained personnel the work requires. Visitors only when escorted by a trained person. Visitor numbers limited and no tour groups. Whole-room Control Area doors are controlled by locks, key cards or another secure method. | Yellow “Yield” sign (or equivalent) |
| FOD Critical Zone | Region, generally within a Control Area, at the highest risk; exposure could cause system or product failure (3.2.8). | Strictly limited to people trained for that zone’s specific risks and needed for the task. Visitors are not permitted. | Bold red “Stop” sign (or equivalent) |
Four other paragraphs shape how you mark the boundary. Where feasible, NASA says the entire room should be designated wall to wall with signs and access control at the doors (5.5.2.1). When that is not feasible, the area is segregated with stanchions or other barriers (5.5.2.2), with a recommended buffer of 3 feet or more around the hardware (5.5.2.3). Each Control Area and Critical Zone gets a designated access point with a FOD control supply station (5.5.2.5). Signs must be posted at the entrances to every level and must clearly indicate the level of control (5.5.7.1), and the signed area agreement is posted at the entrance (5.5.1.5).
Worked example (illustrative): zoning a 60 ft × 80 ft hangar bay
This is an illustrative example. The dimensions are invented to show the method, and your risk assessment sets real boundaries. The bay holds one aircraft with an open engine inlet on a work stand. It has two 20 ft wide roll-up doors and one 3 ft personnel door.
- Control Area, wall to wall. The whole bay is a FOD Control Area, so the boundary is the walls and the three entrances (NASA 5.5.2.1). Floor line: a yellow line across each threshold, 20 + 20 + 3 = 43 ft.
- Critical Zone, nested inside. A 20 ft × 30 ft rectangle around the work stand, where an item lost into the open inlet would be hard to find. Perimeter 2 × (20 + 30) = 100 ft, less one 4 ft gap at the controlled entry = 96 ft of red line.
- Awareness Area as a buffer outside each roll-up door. A band 20 ft wide and 10 ft deep. The side on the door threshold is the yellow line already counted, so each band needs 10 + 20 + 10 = 40 ft, and two bands need 80 ft of blue line. A boundary shared between two zones is counted once.
- Signs at every entrance. Two Awareness signs (one per door approach), three Control signs (one per bay entrance) and one Critical sign at the stand entry: six signs (NASA 5.5.7.1).
- Access points. A supply station at the personnel door for the Control Area and one at the Critical Zone entry, each with the signed area agreement, tool control log and entry log (NASA 5.5.2.5).
| Line | Length | Rolls needed | Left over |
|---|---|---|---|
| Red (Critical Zone) | 96 ft | 1 roll of 108 ft | 12 ft |
| Yellow (Control Area thresholds) | 43 ft | 1 roll | 65 ft |
| Blue (two Awareness bands) | 80 ft | 1 roll | 28 ft |
Rolls per color = line length ÷ 108 ft, rounded up. FODBag suggests adding 10% for mitered corners and repairs before you round (96 ft × 1.1 = 105.6 ft, still one roll). For this bay the tape is one 2 in × 108 ft roll in each of three colors. The FOD tape application guide covers laying and inspecting the lines, and the floor marking planner helps you sketch the lines before you buy.
Decision aid: which level and which boundary?
Use the questions in order. Each answer points to the paragraph that supports it. The questions themselves are a FODBag suggestion assembled from the definitions above, not a published procedure.
| Question | If yes | If no |
|---|---|---|
| 1. Is FOD-sensitive hardware, or an open system that foreign objects could enter, in place or in transit in this area? | Go to question 2. | No FOD-sensitive area designation is needed (NASA 3.2.12 defines a FOD Sensitive Area by the presence of FOD-sensitive hardware). Keep normal housekeeping. |
| 2. Is the potential for entrapment, migration or impact damage high? | Control Area (3.2.6). Go to question 3. | Awareness Area (3.2.5). Mark entrances with signs or other visual cues and train the people who work there. |
| 3. Is there an enclosed or hard-to-inspect space, or work above the hardware, where a lost item would be hard to detect or recover or could cause failure? | Add a Critical Zone inside the Control Area (3.2.8, 5.5.6). Visitors are not permitted. Do not place awareness posters inside it (5.5.6(a)). | Stay at Control Area. |
| 4. Can the whole room be controlled at its doors? | Designate wall to wall and mark each door (5.5.2.1). | Segregate with stanchions or barriers and a buffer of 3 ft or more (5.5.2.2, 5.5.2.3). Floor tape can show the line; the barrier does the controlling. |
| 5. Does each entrance have a sign for the level, an access point, and a posted agreement? | Ready for activation review (5.5.7.1, 5.5.2.5, 5.5.1.5). | Do not activate yet. Fix the missing items first. |
Boundary marking audit checklist
Walk each boundary with this list. The items are a FODBag suggestion built from the paragraphs cited; add your own site rules.
- Every entrance to the area has a sign that states its level (NASA 5.5.7.1).
- The signed area agreement is posted at the entrance, or next to the sign if ropes and stanchions are used (5.5.1.5, 5.5.1.6).
- Control Areas and Critical Zones each have a designated access point with a supply station that holds the agreement and logs (5.5.2.5).
- Barrier-segregated areas show the buffer you chose, and the floor line matches the barrier line (5.5.2.3).
- No awareness posters sit inside a Critical Zone (5.5.6(a)).
- Floor tape is whole: no lifted corners, torn sections or worn-through color. Lifted tape is a tripping and FOD concern, so repair it on the walk.
- Colors and symbols match the written key in your program, and a new employee or visitor can say what each means without coaching.
- Suspended areas: signs and agreement removed or marked suspended; tape and barriers may stay (5.5.3.2(a)). Terminated areas: signs, agreement, tape and barriers removed (5.5.3.3).
Where to go next
Once the levels are decided, the right tape and signs follow from the map. See FOD floor tape in 2 in × 108 ft rolls and FOD area signs (signs from $29.99), and the temporary FOD control zone setup guide for work that changes the map for a few days. Questions about matching products to your area levels? Call FODBag at 602-874-1313.
Sources and how we used them
- NASA MSFC-STD-3598 Rev. D, Standard for FOD Prevention (effective July 26, 2021) — Paragraphs 3.2.5, 3.2.6, 3.2.8, 3.2.12, 5.5, 5.5.1.5–5.5.1.6, 5.5.2.1–5.5.2.5, 5.5.2.4, 5.5.3.2–5.5.3.3, 5.5.6(a), 5.5.7.1 and 5.5.7.3. Free public PDF, read in full. Accessed Nov. 9, 2026.
- IAQG SCMH 3.4.2 Rev. D, FOD Prevention Program: Guidance in Support of IAQG Standard 9146 (June 19, 2023) — Slide 21 (area designation from a FOD risk assessment) and slide 22 (commonly used designations). Slide numbers are the footer numbers in the PDF. Free public document. Accessed Nov. 9, 2026.
- OSHA 29 CFR 1910.144, Safety color code for marking physical hazards — Paragraphs (a)(1) and (a)(3) on red and yellow. It does not address FOD zones. Accessed Nov. 9, 2026.
AS9146 and NAS412 are paid documents and are not reproduced or quoted here, and no clause numbers from them are cited. The example is illustrative and is not a customer case.
Get the FOD Area Classification and Facility Marking Guide
Enter your details and we will email you the PDF right away.
- 28-page guide (PDF)
- Classification, marking and layout guidance
- 4 printable records and registers
- Install, train and audit checklists
Free for internal organizational use. Educational resource from FODBag.com, a Powell Pack Products company.
Get the Free Guide
Enter your details and we will email you the PDF of FOD Area Classification & Facility Marking Guide right away.
Related Reading
Go deeper on the topics in the FOD Area Classification and Facility Marking Guide.
More Free FOD Prevention Guides
Each guide is free to request and written for aerospace, aviation, MRO and manufacturing teams.
Equip Your FOD Program
Frequently Asked Questions
What are the three levels of FOD-sensitive area?
NASA MSFC-STD-3598D classifies FOD-sensitive areas as FOD Awareness Areas (low potential for entrapment, migration or impact damage, also usable as a buffer), FOD Control Areas (high potential) and FOD Critical Zones (the highest risk, generally nested inside a Control Area). IAQG guidance for AS9146 shows Awareness, Control and Critical as commonly used designations.
Is FOD Safe Area an official classification?
No. The cited NASA standard has three classifications and FOD Safe Area is not one of them. FODBag.com uses FOD Safe Area only as a local facility designation that you define in your own written program.
Do the standards require floor tape to mark FOD areas?
Not in the documents we read. NASA MSFC-STD-3598D requires signs at the entrances to each FOD-sensitive area and access controls, and says areas that cannot be controlled wall to wall are segregated with stanchions or other barriers. It mentions floor tape only as a visual cue that may stay in place when an area is suspended and must be removed when an area is terminated.
How wide should the buffer around a FOD Control Area be?
When an area is segregated with stanchions or barriers, NASA MSFC-STD-3598D paragraph 5.5.2.3 recommends a buffer zone of 3 feet or more around the FOD-sensitive hardware. That recommendation comes from a NASA standard for Marshall Space Flight Center projects, so set your own distance in your risk assessment.